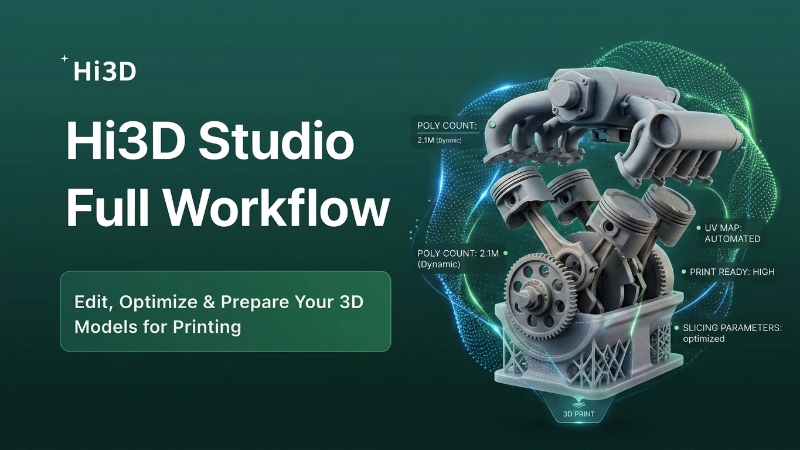
Once you finish generating your custom 3D character model inside Hi3D’s creation engine, Hi3D Studio becomes your all-in-one post-production workspace. This built-in editor integrates sculpting, boolean modeling, split assembly, print optimization, and slicer preparation—all without switching to third-party software.
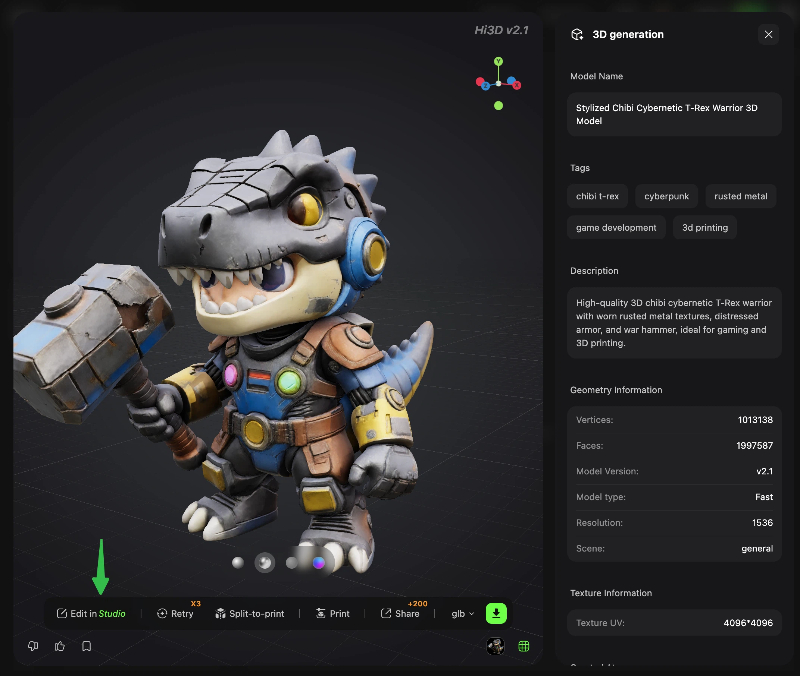
This step-by-step blog walks through every core module shown in the interface, using the armored dino chibi figure as our demo asset.
Overview of Hi3D Studio Main Navigation
The top menu bar hosts all core functional tabs:
Sculpt Mode: Retouch textures, paint colors, create masks
- Boolean: Add/remove geometry with primitive shapes
- Base: Generate printable base supports for standalone figures
- Connector Structure: Split models into interlocking, assembleable parts
- Smart Tools: Auto-repair, mesh measurement, cross-section & decimation
- Smart Slicing Layout: Arrange models on print beds, tweak print parameters
- Left sidebar: Standard viewport controls (move, rotate, zoom, pan)
- Right sidebar: Dynamic parameter panel that changes based on your active tool
- Bottom bar: Quick actions – Save, Smart Layout, Export
| Action | Hotkey |
|---|---|
| Move Object | G |
| Rotate Object | R |
| Scale Object | S |
| Undo | Ctrl + Z |
| Redo | Ctrl + Y |
Module 1: Sculpt Mode – Retouch, Paint & Mask Your Model
Sculpt Mode is your finishing touch station for aesthetic tweaks, split into 3 sub-tools:
- Sculpt: Push/pull mesh details – smooth jagged edges, deepen armor grooves, add small bumps to the dino’s spines or armor plating. Ideal for fixing low-poly artifacts from AI generation.
- Paint: Hand-paint custom textures directly on the 3D asset. Touch up faded paint on the character’s blue helmet speakers, weather the brown metal armor, or recolor the tail gradient without external texture software.
- Mask: Create selection masks to isolate regions. Use masks to restrict sculpt/paint edits to only the head, limbs, or torso—avoid accidental changes to finished sections.
Pro Tip: Always save a copy of your model after sculpt/paint work before moving to boolean or split operations.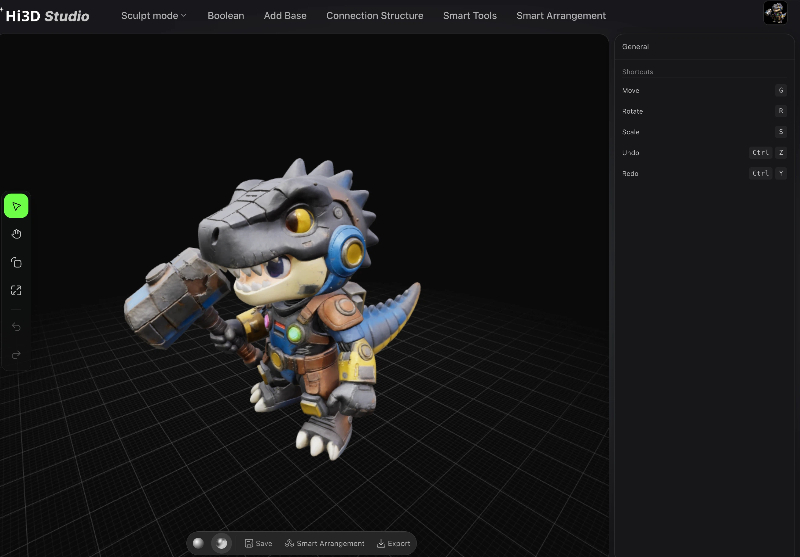
Module 2: Boolean – Add or Subtract Geometry with Primitive Shapes
The Boolean tab lets you merge or cut mesh using basic primitives (sphere, cube, cylinder, cone, torus).
Core Workflow
- Select a base shape from the right sidebar (sphere used in our demo).
- Adjust Object Size slider, then drag the primitive in the viewport or input exact X/Y/Z position/rotation values.
- Choose your boolean operation type:
- Union (+): Merge the primitive into your main model (add armor bolts, decorative spheres)
- Difference (-): Cut the primitive shape out of your model (drill holes, hollow out sections)
- Intersection (×): Keep only overlapping geometry between the primitive and your figure
- Toggle Drag Object for real-time viewport adjustment without typing coordinate numbers.
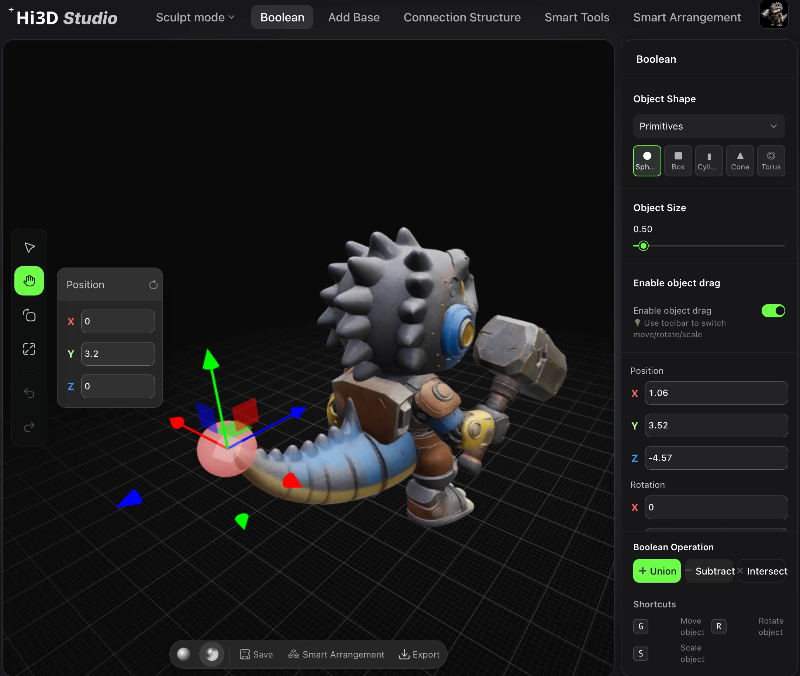
Use Case Example: Use a small cylinder boolean difference to punch a mounting hole in the dino’s palm for weapon accessories.
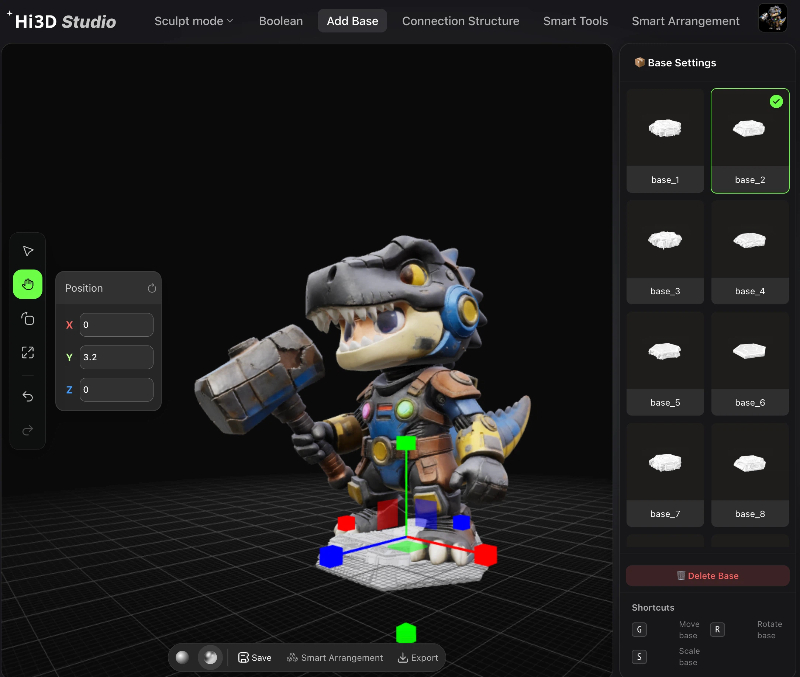
Module 3: Base – Generate Printable Support Bases
Tall, top-heavy chibi models (like our armored dino) will tip over mid-print without a stable base. The Base tool auto-generates a mesh platform under your character’s feet:
- Switch to the Base tab in the top navigation.
- The software auto-detects the contact area between your model’s legs and the print bed plane.
- Tweak base thickness, edge offset, and silhouette shape in the right panel.
- The generated base fuses to the model’s feet to eliminate unstable floating geometry.
After generation, you can combine the base with the main mesh via boolean union, or keep it separate for easy post-print removal.
Module 4: Connector Structure – Split Models for Multi-Part Assembly
For large figures or multi-color printing workflows, split your model into detachable, interlocking parts with built-in connection joints.
Step-by-Step Split Process
- Navigate to the Connector Structure tab.
- Draw split lines across the mesh to separate the head, torso, left arm, right arm, left boot, right boot (as seen on our cartoon girl demo asset).
- The system auto-labels each connection point (#1 to #5 in the screenshot).
- Click Add All Connectors to generate matching male/female snap-fit joints at every split seam.
- Toggle Explode View to preview separated parts; enable X-Ray to inspect hidden joint geometry.
- Hit Export to output individual printable meshes for each component.
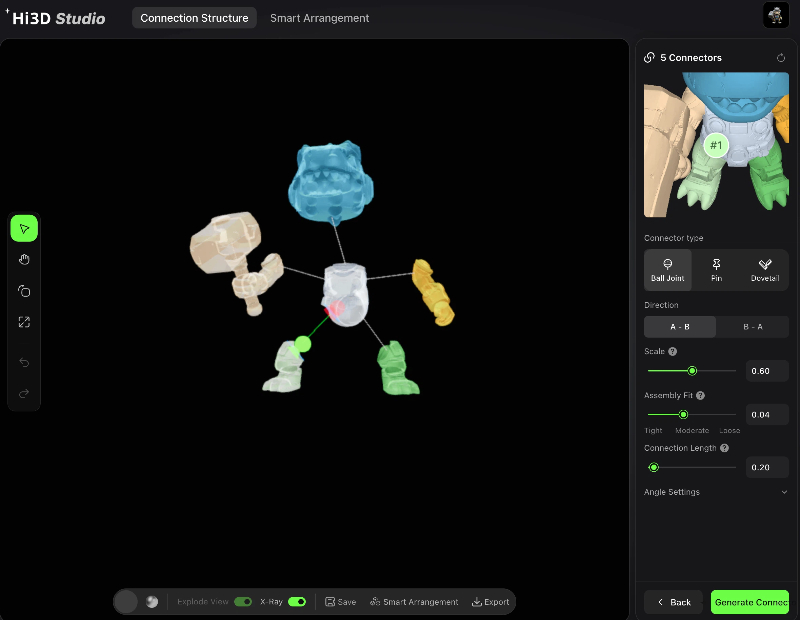
Key Benefit: Split models drastically reduce support waste, improve surface quality, and enable multi-material 3D printing workflows.
Module 5: Smart Tools – Mesh Repair & Optimization Utilities
This tab houses automated mesh fixes to eliminate print failures:
- Measurement Tool: Check exact dimensions of limbs, heads, or custom accessories for scale consistency.
- Cross-Section View: Slice the model open to inspect hollow interiors, wall thickness, and hidden geometry flaws.
- Decimation Optimization: Reduce polygon count for faster slicing and smoother viewport performance (without ruining surface details).
- Model Repair: Auto-fix non-manifold edges, loose vertices, holes, and flipped normals—common broken mesh issues from AI model generation.
- Model Inspection: Run an automated print readiness check to flag thin walls, overhangs, and unstable floating geometry before slicing.

Mandatory Step: Always run Model Repair + Model Inspection before moving to Smart Layout.
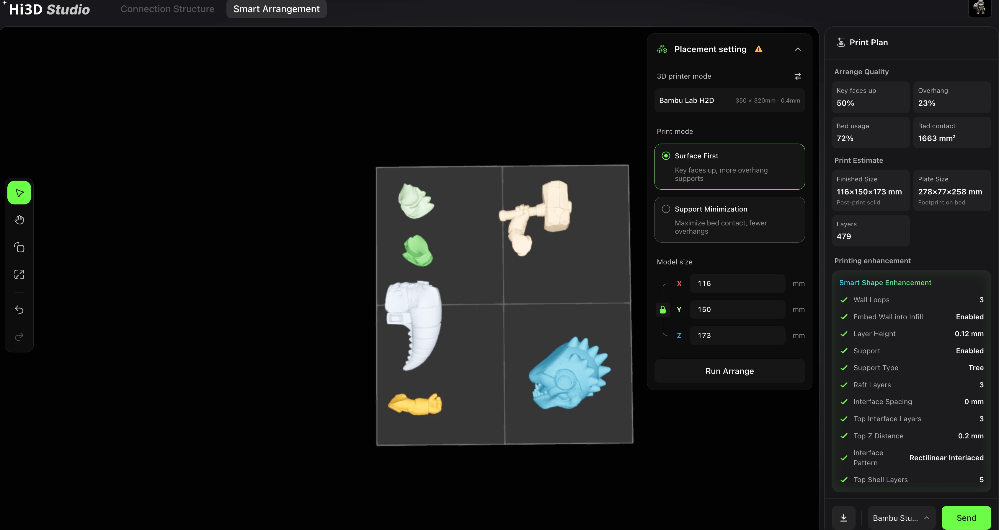
Module 6: Smart Slicing Layout – Finalize Print Settings & Send to Printer
Once your model is edited, repaired, and split, use the Smart Layout tab to prepare for direct 3D printing with Bambu Lab H2D (compatible with most FDM printers).
Core Configuration Steps
- Printer Selection: Pick your connected hardware (Bambu Lab H2D in our demo, build volume: 350×320mm, 0.4mm nozzle).
- Print Mode Toggle:
- Surface Priority: Prioritize clean, smooth model surfaces; adds extra supports for overhangs (best for detailed collectible figures like our dino).
- Minimal Support Priority: Maximize bed contact area, cut down support material (great for simple, low-detail geometric models).
- Model Dimensions Lock: View locked X/Y/Z measurements of your asset (67×87×100mm for the armored dino). Adjust scale directly here to resize your whole figure.
- Start Layout: The algorithm auto-rotates and positions your model to minimize support material while protecting key detailed surfaces.
- Smart Print Enhancement Tweaks (Right Side Panel):
- Layer height: 0.12mm for ultra-fine miniatures
- Tree-style supports for easy removal
- Custom contact line patterns, top shell layers, and Z-gap adjustments to prevent print adhesion damage
- Final Actions:
- Export: Save sliced files or edited mesh to local storage
- Send: Push the optimized print job straight to your connected 3D printer
Print Preview Metrics
After layout generation, review key stats:
- Key surface exposure ratio, empty bed space percentage
- Bed utilization footprint & contact surface area
- Total print layer count (542 layers for our demo figure)
Full End-to-End Workflow Recap
Follow this streamlined order for every Hi3D model project:
- Generate your AI 3D character in the main Hi3D creation tool
- Open Hi3D Studio to refine aesthetics: Sculpt Mode (sculpt + paint + mask)
- Use Boolean to add custom geometry or cut out accessory mounting points
- Run Smart Tools → Model Repair + Model Inspection to fix mesh errors
- Optional: Use Connector Structure to split into multi-part assembleable figure
- Generate a stable print base via the Base tab
- Navigate to Smart Layout, select your printer, adjust print quality modes
- Start auto-layout, tweak support & layer settings
- Export the finished mesh or hit Send to begin 3D printing
Hi3D Studio removes the need to jump between ZBrush, Blender, and separate slicer software for small-batch collectible figure creation. Every tool is purpose-built for stylized chibi, sci-fi, and cartoon character printing—from texture painting to snap-fit split assembly and one-click printer submission. Experiment with sculpt weathering, boolean custom props, and multi-part splitting to unlock fully personalized 3D printed art toys.