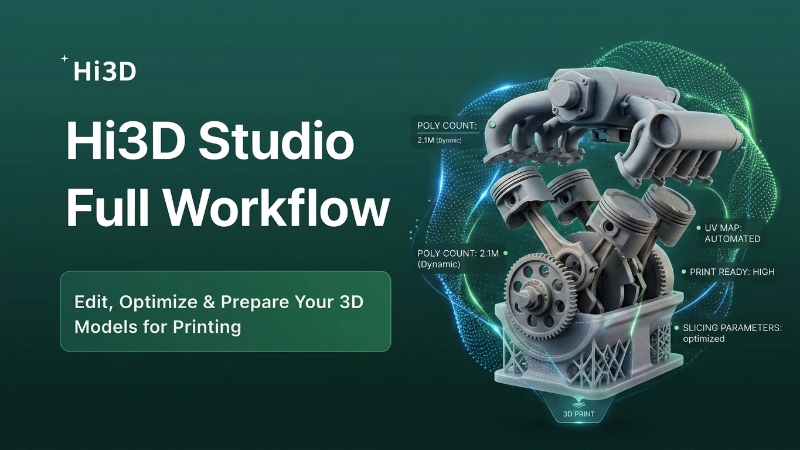
Introduction
Large, highly detailed 3D art toys often face printing issues like heavy support waste, surface scratches, unstable overhangs or failed multi-color AMS printing if kept as a single mesh. Hi3D Studio solves this with two core integrated tools: Auto Connection Split and AI Smart Arrangement.
First, the tool automatically divides your character into separate, assembleable parts with customizable interlock connectors. After splitting, Smart Arrangement will analyze all your model parts, then auto-place them on the print bed with two optimized layout modes. All slicing parameters are embedded, allowing one-click transfer to mainstream slicers without repeated manual tuning.
Step 1 – Auto Split Model with Custom Connectors
Enter Connection Structure Workspace
- Finish sculpt, texture painting and mesh repair in advance.
- Switch to the top tab Connection Structure.
- Draw split lines on the mesh to separate head, torso, arms, legs and accessories. The system auto generates connection markers for each split seam.
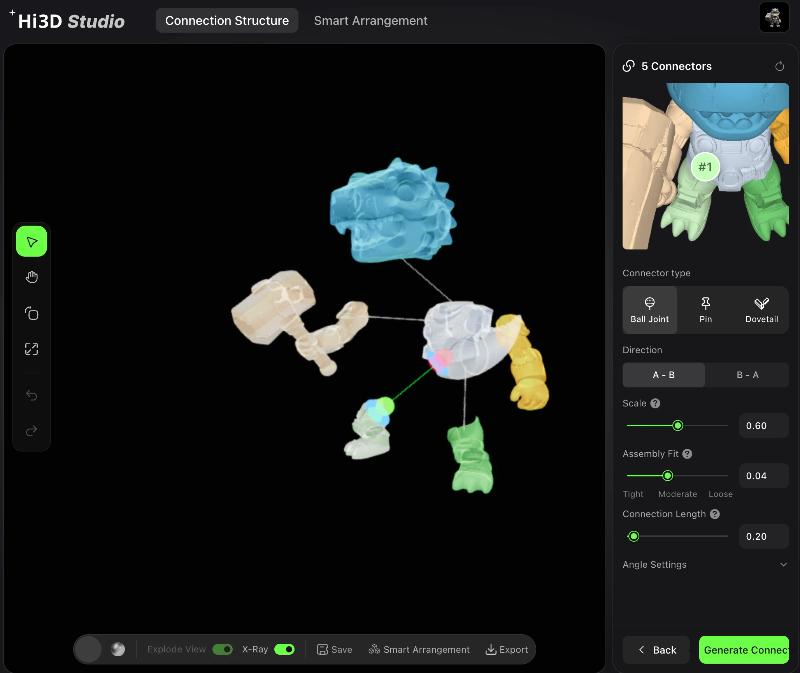
Choose 3 Types of Interlock Connectors
Right-side connector panel provides 3 industrial joint styles for different assembly needs:
- Ball Joint: Movable articulated joint, perfect for poseable action figures
- Pin: Simple snap-fit straight tenon, easy assembly for static collectibles
- Dovetail: Firm anti-slip lock, prevents loose separation for heavy large parts
Adjustable sliders:
- Scale: Control connector size to match model wall thickness
- Assembly Fit: Tight / Moderate / Loose, adjust print tolerance for assembly
- Connection Length: Modify the depth of male & female joint structures
Toggle Explode View to preview separated parts; turn on X-Ray to inspect hidden internal joint geometry. Click Generate Connectors to finalize split mesh.
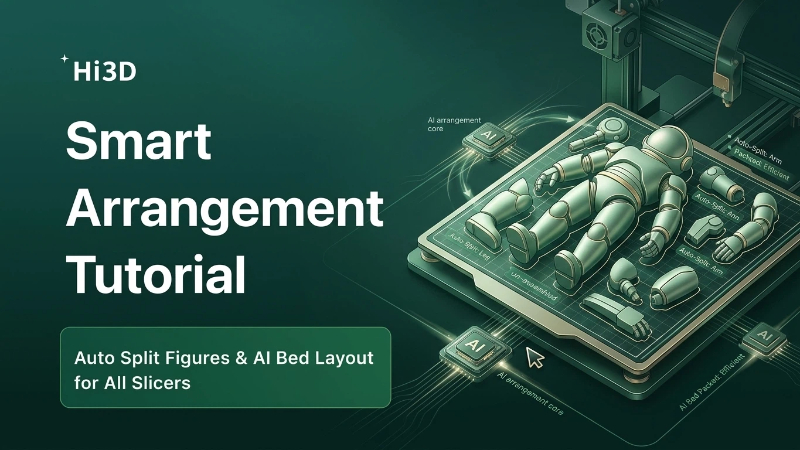
Step 2 – Smart Arrangement AI Layout Modes
Switch to Smart Arrangement Tab
After generating split connectors, click top tab Smart Arrangement to open print bed layout workspace.
Select your printer model first (demo device: Bambu Lab H2D, build volume 350×320mm, 0.4mm nozzle). Two exclusive print optimization modes are available.
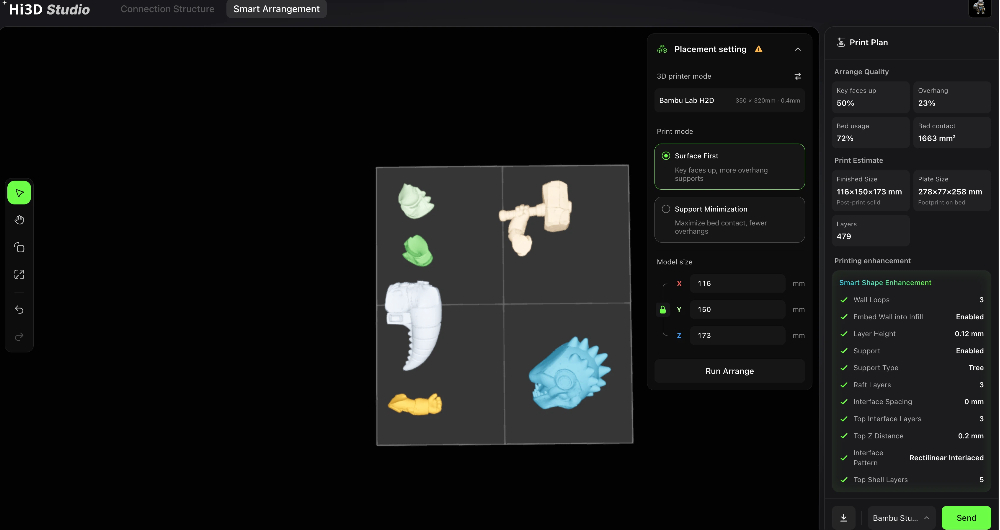
Mode 1: Surface First
- Core Logic: Prioritize rotating parts to keep delicate decorative surfaces facing upward, even if extra overhang supports are required.
- Suitable Models: Chibi figures, detailed armored toys, characters with painted textures, multi-color AMS prints.
- Auto Optimizations the AI applies:
- Rotate spines, helmet decals, facial details to the top surface to avoid layer lines & support scars.
- Activate tree-style soft supports to minimize damage when removing supports.
- Increase top interface layers to protect painted texture surfaces.
- Data Reference: As shown in preview: Key faces up ratio 50%, Overhang ratio 23%.
Mode 2: Support Minimization
- Core Logic: Maximize flat bed contact area for every split part, reduce total support material consumption and printing time.
- Suitable Models: Simple geometric props, thick solid accessories, low-detail structural parts.
- Auto Optimizations the AI applies:
- Rotate flat bottom planes to fully stick to print bed, cut overhang area drastically.
- Lower support density and reduce raft layers to save filament.
- Adjust interface spacing for faster post-processing cleanup.
Smart Printing Enhancement Auto Parameters
All settings under Smart Shape Enhancement will auto-switch values based on your chosen layout mode, no manual editing needed:
- Layer Height: 0.12mm fixed for high-detail miniatures
- Support Type: Tree support (soft, easy peel)
- Raft Layers, Interface Spacing, Top Z Distance, Interface Pattern auto-adjusted
Run AI Auto Arrangement
EN: After selecting print mode, click Run Arrange. The algorithm automatically calculates the optimal position & rotation for all split parts, filling the print bed efficiently without overlapping geometry.
Review print statistics on the right panel: bed usage ratio, contact area, total print layers, finished model dimensions.
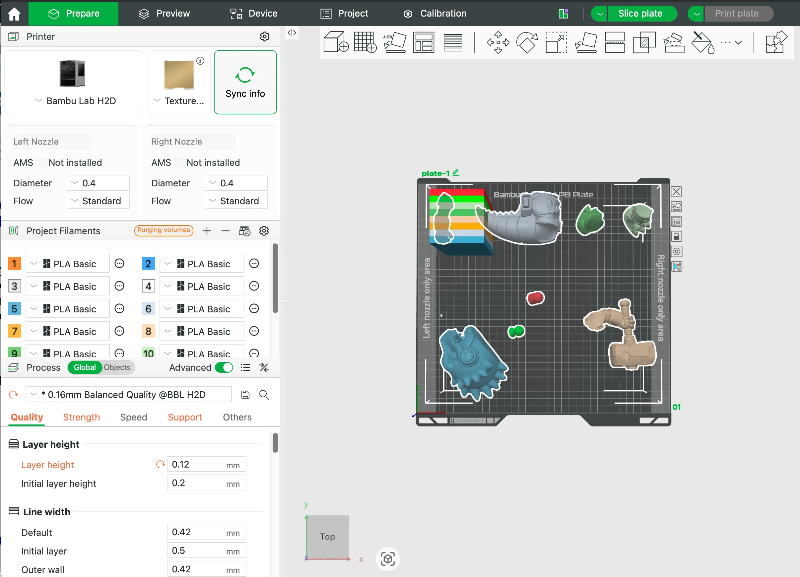
Part 3: Step 3 – Send Pre-Configured Job to All Mainstream Slicers
Supported Slicer List
Click the slicer dropdown at the bottom, Hi3D Studio fully compatible with 4 industry slicing tools:
- Bambu Studio (Official match for Bambu Lab printers, full multi-color 3MF data support)
- OrcaSlicer (High-performance open-source slicer for FDM)
- Creality Print (Creality printer native slicer)
- ElegooSlicer (Resin & FDM all-in-one slicer for Elegoo machines)
One-Click Send Workflow
- Complete AI smart arrangement and confirm all print enhancement parameters.
- Open the slicer dropdown menu and select your target slicing software.
- Hit the green Send button.
- The system transmits all data in one package: split multi-part mesh, texture color info, bed layout position, support & layer settings, tolerance parameters.
- Open your slicer, the fully pre-set model is loaded instantly – no repositioning or re-tweaking supports, ready to slice and print directly.
Complete End-to-End Split & Arrangement Workflow Recap
- Import finished AI-generated model into Hi3D Studio, run Model Repair & Inspection in Smart Tools.
- Navigate to Connection Structure, draw split lines and generate connectors (Ball Joint / Pin / Dovetail).
- Preview Explode View & X-Ray, adjust connector scale and assembly tolerance as needed.
- Switch to Smart Arrangement tab, select your 3D printer hardware.
- Choose layout mode: Surface First (detailed art toys) / Support Minimization (simple props).
- Click Run Arrange to let AI auto-layout all split parts on print bed.
- Check print metrics and auto-generated smart enhancement parameters.
- Select your slicer software from the dropdown list.
- Tap Send to push fully configured print data to slicer, slice and print immediately.
Pro Tips
- For poseable action figures, pick Ball Joint connectors to retain movable joints after printing.
- Always use Surface First mode if your model has painted textures or delicate facial details.
- If split parts are small and flat, switch to Support Minimization to save filament.
- After sending to slicer, all connector assembly tolerances are embedded – no extra adjustment for snap fit.
- Export 3MF format before sending if you need to archive the full split layout and color data.
Closing Thoughts
Hi3D integrates automatic model splitting, customizable interlock joints and AI intelligent bed arrangement into a single pipeline. The dual layout modes adapt intelligently to different model characteristics, and cross-slicer one-click data delivery eliminates repetitive parameter setup work. This all-in-one workflow drastically lowers the technical threshold for creating high-quality multi-part 3D printed art toys.